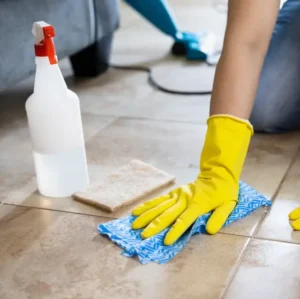
A clean kitchen floor makes the whole kitchen look fresher, brighter and more comfortable. However, kitchen tiles collect food crumbs, grease, dust, stains and dirt every day, so regular cleaning is important.
Learning how to clean floor tiles in kitchen areas properly can help you remove everyday dirt without damaging the tile surface or grout. The best approach depends on your tile material, the type of stain and whether your grout is sealed.
This guide explains simple cleaning methods for ceramic, porcelain and common kitchen floor tiles. It also covers grout cleaning, grease removal, stain treatment, common mistakes and ways to keep your floor cleaner for longer.
Why Kitchen Floor Tiles Get Dirty So Quickly
Kitchen floors experience more traffic and spills than many other areas of a home. Food particles, cooking oil, muddy shoes and spilled drinks can quickly create a dull or sticky layer on the surface.
Grout can become even dirtier because it is usually more porous than the tile itself. Regular sweeping and gentle mopping prevent loose dirt from becoming embedded in grout lines.
Grease deserves special attention because cooking oils can leave a thin film over tiles. That film attracts dust and can make the floor look cloudy even after ordinary mopping.
How to Clean Floor Tiles in Kitchen Safely
Before choosing a cleaner, identify the type of tile installed in your kitchen. Ceramic and porcelain tiles can generally handle regular cleaning well, while natural stone such as marble and limestone requires more careful product selection.
For most ceramic and porcelain floors, manufacturers recommend removing loose dirt first and then using warm water with a suitable neutral or pH-balanced tile cleaner. Avoid assuming that a stronger cleaner will produce better results because harsh products can damage grout or protective sealers.
Step 1: Remove Loose Dirt and Food
Start by sweeping the entire kitchen floor with a soft broom or vacuuming it with a suitable floor attachment. Pay attention to corners, areas under cabinets and spaces around appliances where crumbs commonly collect.
This step matters because sand and gritty particles can scratch some tile finishes when they move under a mop or cleaning pad. Regularly removing dry soil also helps reduce grout discoloration.
Step 2: Prepare a Suitable Cleaning Solution
Fill a bucket with warm water and add a pH-neutral cleaner designed for your tile type, following the product label. Using too much cleaner can leave a sticky film that attracts additional dirt.
If you are unsure about a product, test it on a small hidden section first. Always check the tile and grout manufacturer’s recommendations because different materials can have different cleaning requirements.
Step 3: Mop the Floor in Small Sections
Dip a clean mop into the solution and wring it well before cleaning the floor. Work in small sections so you can remove dirt before the cleaning solution dries on the surface.
Rinse the mop regularly because a dirty mop can simply spread grease and muddy water around the kitchen. Clean water and a properly rinsed mop help prevent streaks and leftover cleaning residue.
Step 4: Rinse When Necessary
If your cleaning product requires rinsing, use clean water after washing the floor. Rinsing can also help when the floor feels sticky after mopping.
Tile Council of North America notes that leftover detergent can combine with soil and create a sticky film, particularly around porous grout lines.
Step 5: Let the Floor Dry
Allow the floor to air-dry or use a clean, dry microfiber mop to remove excess moisture. Drying helps reveal missed spots and reduces water marks on glossy tiles.
Do not leave large amounts of dirty water sitting on the floor, especially around grout joints. A clean, dry surface also makes it easier to notice stains that require additional treatment.
Best Cleaning Methods for Different Kitchen Tile Types
Not every floor tile should receive exactly the same treatment. Understanding your surface helps you choose an effective method while reducing the chance of damage.
| Tile Type | Cleaning Method & Advice | Main Caution |
|---|---|---|
| Ceramic | Everyday: Warm water and pH-neutral cleaner. Deep clean: Tile-safe cleaner and soft brush. | Avoid abrasive tools. |
| Porcelain | Everyday: Vacuum and damp mop. Deep clean: Tile-safe cleaner for stubborn dirt. | Avoid harsh chemicals. |
| Natural Stone | Everyday: Stone-safe neutral cleaner. Deep clean: Stone-specific cleaning products. | Avoid acids unless the manufacturer approves them. |
| Textured Tile | Everyday: Vacuum and damp mop. Deep clean: Use a soft brush for textured areas. | Dirt can collect in grooves. |
| Glossy Tile | Everyday: Soft mop and clean water. Deep clean: Use a gentle tile cleaner. | Avoid abrasive pads. |
LATICRETE recommends warm water, nonabrasive cleaning tools and a neutral cleaner formulated for ceramic and porcelain tile. It also warns against cleaners containing acids, bleach, ammonia or abrasives when they can damage grout sealers or surfaces.
How to Clean Grease From Kitchen Floor Tiles
Grease is one of the most common reasons kitchen floors become dull. Cooking oil can spread across the floor through splashes, shoes and cleaning water.
For light grease, start with warm water and a suitable tile cleaner. For heavier buildup, choose a product specifically labeled for your tile and grout, apply it according to the instructions, gently agitate the area and rinse thoroughly.
Do not use an excessive amount of cleaning product simply because the floor looks greasy. Too much product can leave residue and may make the surface feel sticky after drying.
How to Clean Grout Between Kitchen Floor Tiles
Grout needs separate attention because it can absorb dirt more easily than many tile surfaces. Dark or discolored grout does not always mean that the tile itself is dirty.
For routine grout cleaning, use a cleaner that is appropriate for grout and a soft or medium soft brush. Apply the product as directed, gently scrub the grout lines, rinse away the cleaner and allow the area to dry.
The American Cleaning Institute explains that grout is generally porous and recommends suitable alkaline cleaning methods rather than repeatedly exposing cement-based grout to acidic cleaners.
Can Baking Soda Clean Tile Grout?
Baking soda mixed with water can form a mild paste that may help with light grout dirt. Apply a small amount, gently scrub with an appropriate brush, rinse well and allow the grout to dry.
However, always test homemade cleaning methods on an inconspicuous area first. The condition, material, color and sealer of your grout can affect how it responds to cleaning.
Should You Use Vinegar on Kitchen Floor Tiles?
Vinegar is often suggested as a natural floor cleaner, but it is not suitable for every tile or grout type. Its acidity can affect certain natural stones and may weaken cement-based grout when used repeatedly.
Some manufacturers specifically advise avoiding acidic cleaners for ceramic and porcelain tile and grout care.
If you are considering vinegar, first confirm that your specific tile and grout manufacturer allows it. Never assume that a natural cleaner is automatically safe for every flooring material.
How to Remove Common Kitchen Floor Stains
Different stains require different approaches. The safest strategy is to clean a spill as soon as possible instead of allowing it to dry and become harder to remove.
| Stain | Recommended First Approach |
|---|---|
| Food spills | Remove solids, then clean with a suitable neutral cleaner |
| Cooking oil | Use a tile-safe cleaner designed to remove grease |
| Coffee or tea | Wipe quickly and clean with an appropriate tile cleaner |
| Mud | Allow it to dry, remove loose material, then clean |
| Sticky residue | Use suitable cleaner and rinse thoroughly |
| Grout discoloration | Use a grout-safe cleaner and appropriate brush |
| Hard-water residue | Use only a product approved for the tile and grout |
LATICRETE recommends removing food and liquid spills promptly and using a neutral cleaner appropriate for ceramic and porcelain surfaces.
How to Clean Floor Tiles in Kitchen Without Leaving Streaks
Streaks usually appear because of dirty mop water, excessive cleaning solution or residue left behind after cleaning. Glossy tiles can make these marks particularly noticeable because they reflect light.
Use a clean mop, change dirty water regularly and follow the cleaner’s recommended dilution. A small amount of the correct cleaner is often more effective than a large amount of the wrong product.
After mopping, inspect the floor from different angles. If you notice a cloudy film, wipe the area with clean water and dry it with a clean microfiber cloth or mop.
How Often Should You Clean Kitchen Floor Tiles?
The ideal cleaning schedule depends on how heavily the kitchen is used. A busy kitchen may need daily sweeping and frequent spot cleaning, while a lightly used kitchen may require less frequent deep cleaning.
| Cleaning Task | Suggested Frequency |
|---|---|
| Sweep or vacuum | Daily or as needed |
| Spot clean spills | Immediately |
| Damp mop | Several times per week or as needed |
| Grout cleaning | As needed when dirt builds up |
| Deep floor cleaning | Periodically based on traffic |
| Check grout sealer | According to manufacturer guidance |
Regular maintenance is easier than trying to remove months of accumulated grease and dirt. Small cleaning sessions can prevent heavy buildup and reduce the amount of scrubbing required later.
How to Clean Textured Kitchen Floor Tiles
Textured tiles can provide useful traction, but their grooves can trap crumbs, dust and grease. A standard flat mop may clean the surface while leaving dirt inside deeper textures.
Begin by vacuuming or sweeping thoroughly. Then use a tile-safe cleaning solution and a soft brush to work into the textured areas without using excessive force.
BISSELL notes that matte and textured porcelain can trap dirt more readily because of the surface texture, making regular vacuuming particularly useful.
Common Mistakes to Avoid When Cleaning Kitchen Tiles
One common mistake involves using too much cleaning solution. Extra product does not necessarily mean extra cleaning power and leftover detergent can create residue that attracts dirt.
Another mistake involves using abrasive pads on glossy tiles. Aggressive scrubbing can leave scratches or change the appearance of some surfaces, so start with the gentlest effective method.
Mixing household cleaning chemicals is another serious mistake. For example, Clorox warns against mixing bleach-based cleaners with other household chemicals because dangerous fumes can result.
How to Keep Kitchen Floor Tiles Cleaner for Longer
A good cleaning routine begins before the floor becomes visibly dirty. Sweep frequently, clean spills quickly and use mats near entrances where outdoor dirt can enter the kitchen.
Keep the mop and cleaning tools themselves clean. A dirty mop can transfer grease and soil back onto tiles instead of removing them.
You should also avoid allowing food and oily spills to remain on the floor for long periods. Fast spot cleaning reduces staining and makes your regular floor-cleaning routine much easier.
How to Clean Floor Tiles in Kitchen Naturally
If you prefer simple cleaning methods, begin with warm water and a clean microfiber mop. For compatible ceramic or porcelain surfaces, you can consider other mild methods only after checking the tile manufacturer’s care instructions.
Natural does not always mean safe for every surface. Vinegar, for example, can be unsuitable for natural stone and can affect some grout types with repeated use.
The safest natural approach is usually to remove loose dirt regularly, clean spills quickly, use water appropriately and avoid unnecessary chemicals. When stronger cleaning becomes necessary, choose a product specifically designed for your tile material.
When Should You Deep Clean Kitchen Floor Tiles?
You may need a deeper cleaning session when ordinary mopping no longer removes the dull appearance or when grout becomes visibly dirty. Heavy grease, dried food and accumulated soil usually require more focused cleaning.
Work on a small section at a time rather than covering the entire floor with a large amount of cleaner. Follow the product directions carefully and rinse the surface when required.
For severe staining, damaged grout or unknown tile materials, consider getting advice from a tile-care professional. Using the wrong chemical on natural stone or sensitive grout can create more problems than the original stain.
Conclusion
Knowing how to clean floor tiles in kitchen spaces does not require complicated equipment or an expensive collection of products. A consistent routine of sweeping, appropriate mopping, quick spill removal and careful grout cleaning can keep most kitchen floors looking fresh.
The most important rule is to match your cleaning method to your flooring material. Use gentle, tile-appropriate products, avoid unnecessary harsh chemicals and follow the manufacturer’s care instructions whenever possible.
Frequently Asked Questions
What is the best way to clean kitchen floor tiles?
The best routine starts with sweeping or vacuuming loose dirt, followed by damp mopping with warm water and a suitable pH-neutral tile cleaner. Always choose products according to the tile and grout manufacturer’s recommendations.
How often should kitchen floor tiles be mopped?
Most kitchens benefit from regular damp mopping several times a week, depending on cooking activity and foot traffic. Clean spills immediately rather than waiting for your scheduled cleaning day.
Can I use vinegar to clean kitchen floor tiles?
Vinegar is not suitable for every tile or grout material. Check manufacturer instructions before using acidic cleaners, particularly if your floor contains natural stone or cement-based grout.
Why do my kitchen tiles look dull after mopping?
A dull or cloudy appearance can result from cleaning residue, dirty mop water, grease buildup or an unsuitable cleaning product. Try cleaning with the correct diluted product and rinsing thoroughly.
How can I clean dirty grout?
Use a grout-safe cleaner and an appropriate brush, then rinse the area thoroughly. The American Cleaning Institute recommends suitable alkaline cleaning methods because acids can damage cement-based grout over time.
Can bleach be used on kitchen tile grout?
Some bleach products are labeled for suitable ceramic tile and grout surfaces, but they must be used exactly according to their labels. Never mix bleach with other household cleaners, as hazardous fumes can result.