A clean kitchen floor makes the entire kitchen look fresh, safe and well maintained. The floor collects crumbs, grease, dust, food spills and dirt every day, so regular cleaning is important.
If you are wondering how do you clean a kitchen floor, the answer depends on the type of flooring you have. Tile, vinyl, laminate, hardwood and natural stone floors can all need different cleaning methods.
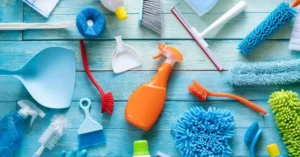
The good news is that you do not need expensive tools to keep your kitchen floor clean. A broom or vacuum, microfiber mop, warm water and the right floor cleaner can handle most everyday messes.
According to the CDC, regular cleaning with soap or detergent and water can remove dirt and many germs from hard surfaces. You should clean visibly dirty surfaces regularly and follow the manufacturer’s instructions for specialty flooring.
Why Is Kitchen Floor Cleaning Important?
The kitchen floor receives heavy foot traffic and often sits below food preparation areas. Small food particles, grease and moisture can quickly build up when you do not clean the floor regularly.
A dirty floor can also make the kitchen feel unpleasant and may create slippery areas when grease or liquid spills remain on the surface. Regular cleaning helps remove dirt, reduce buildup and keep the floor looking better.
Kitchen floors also collect particles that people can carry into other rooms. A simple cleaning routine helps stop this dirt from spreading throughout your home.
You should also remember that cleaning and disinfecting are not the same thing. Cleaning removes dirt and impurities, while disinfecting uses products designed to kill remaining germs after cleaning.
How Do You Clean a Kitchen Floor Step by Step?
The best approach starts with removing loose dirt before using water or cleaning products. This simple step prevents crumbs and dust from turning into muddy residue during mopping.
Step 1 – Remove Everything From the Floor
Start by moving lightweight chairs, mats, bins and other removable items away from the cleaning area. This gives you more space and prevents dirt from collecting around objects.
Pick up large food pieces and visible debris before you sweep or vacuum. Check around cabinets, under the table, beside the refrigerator and near cooking areas.
Step 2 – Sweep or Vacuum the Floor
Use a soft broom or vacuum to remove loose dirt, crumbs, pet hair and dust. Pay special attention to corners because dirt often gathers along walls and under cabinets.
Vacuuming can work especially well on textured tile, vinyl and areas where crumbs collect easily. Do not skip dry cleaning before mopping, because loose dirt can spread across the wet floor.
The CDC lists mops and microfiber floor cloths among suitable floor-cleaning equipment. It also recommends keeping cleaning equipment clean and dry between uses.
Step 3 – Choose the Right Floor Cleaner
The type of flooring should guide your choice of cleaning product. Always check the flooring manufacturer’s care instructions before using a new cleaner.
For many sealed hard floors, a cleaner designed specifically for that surface can provide good results. Avoid using a strong chemical simply because the floor looks dirty.
A product that works well on ceramic tile may not be suitable for hardwood or some natural stone. Using the wrong cleaner can damage the finish or leave unwanted residue.
Step 4 – Prepare the Mop
Fill a bucket with the amount of water recommended by your cleaning product. Add the correct amount of floor cleaner instead of adding extra product for a stronger effect.
Too much cleaner can leave a film on the floor. Recent cleaning guidance also notes that excessive cleaner can contribute to sticky residue after mopping.
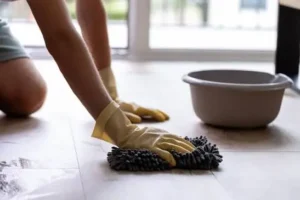
Use a clean microfiber mop whenever possible. A dirty mop can move grease and dirt from one part of the kitchen to another instead of removing it.
Step 5 – Mop in Small Sections
Start at the farthest corner of the kitchen and work toward the exit. This method helps you avoid walking across areas that you have already cleaned.
Mop small sections instead of covering the entire kitchen with excess water. The mop should be damp rather than soaking wet, especially when cleaning floors that can suffer from moisture damage.
Rinse or change the mop water when it becomes visibly dirty. A two-bucket method can also help keep cleaning solution separate from rinse water.
Step 6 – Treat Greasy Areas Separately
Kitchen floors often develop greasy patches near the stove, oven, sink and food preparation areas. A normal mop may not remove heavy grease in one pass.
Apply a suitable cleaner to the affected area according to its label. Allow the product to work for the recommended time, then wipe or mop the area properly.
Never mix different cleaning chemicals together. The CDC specifically warns that mixing bleach with other cleaners or disinfectants can create dangerous vapors.
Step 7 – Rinse When Needed
Some floor cleaners require rinsing, while others do not. Read the product label before deciding whether a second pass with clean water is necessary.
Rinsing can help remove leftover cleaner when the product instructions recommend it. However, unnecessary water can create problems on moisture-sensitive floors.
Use a clean mop for the final pass. Then allow the floor to dry completely before returning mats, chairs, or other items.
How Do You Clean a Kitchen Floor Based on Flooring Type?
Different flooring materials need different levels of care. The safest method always starts with the flooring manufacturer’s instructions.
| Kitchen Floor Type | Recommended Cleaning Method | Important Care Tip |
|---|---|---|
| Ceramic Tile | Sweep, mop and clean grout when needed | Use a suitable tile cleaner |
| Porcelain Tile | Vacuum or sweep and damp mop | Avoid unnecessary harsh chemicals |
| Vinyl | Sweep and damp mop | Avoid excess water and abrasive tools |
| Laminate | Vacuum and use a slightly damp mop | Keep standing water away |
| Hardwood | Sweep and use an approved cleaner | Avoid soaking the floor |
| Natural Stone | Sweep and use a stone-safe cleaner | Avoid unsuitable acidic cleaners |
| Sealed Concrete | Sweep and damp mop | Follow the sealer manufacturer’s care advice |
Cleaning Ceramic and Porcelain Tile
Tile floors are common in kitchens because they handle regular foot traffic well. However, dirt can settle into grout lines and make the entire floor look dull.
Sweep or vacuum first, then use a cleaner made for tile. For stubborn grout, use a suitable grout cleaner and a soft or nylon brush.
Rust-Oleum recommends starting with a pH-neutral cleaner that is safe for the particular tile or stone surface.
Cleaning Vinyl Kitchen Floors
Vinyl floors usually need gentle cleaning rather than aggressive scrubbing. Remove loose dirt first, then use a cleaner approved for vinyl flooring.
Avoid soaking the floor with water. Excess moisture can enter seams or edges and may create problems over time.
Cleaning Laminate Floors
Laminate flooring can look attractive in a kitchen, but it does not need large amounts of water. Use a vacuum or soft broom before wiping with a lightly damp mop.
Never leave standing water on laminate flooring. Dry any accidental spills quickly and follow the care instructions supplied with your specific flooring.
Cleaning Hardwood Floors
Hardwood requires extra care because water can damage wood and its finish. Use a cleaning product designed for your hardwood floor and avoid soaking the surface.
Sweep or vacuum regularly to remove particles that could scratch the finish. Clean spills quickly and keep moisture under control.
Cleaning Natural Stone Floors
Natural stone can include marble, limestone, travertine, slate and other materials. These surfaces can react differently to cleaning chemicals.
Use a product specifically designed for your stone type. Always test a new product in a hidden area first if the manufacturer’s instructions allow it.
How Do You Clean a Kitchen Floor With Grease?
Grease requires more attention because ordinary water may not break down oily residue effectively. Start by removing loose dirt before treating the greasy area.
Use a floor-safe degreasing product according to its label instructions. Work on small areas and avoid spreading the grease across the entire floor.
For heavy grease on suitable tile or grout, specialized alkaline cleaners may help break down oily soil. Some professional products are designed specifically for tile, grout, vinyl and other hard surfaces.
After treating the grease, mop the area with clean water if the product instructions require rinsing. Dry the floor afterward to reduce slippery conditions.
How Do You Clean a Kitchen Floor Without Leaving Streaks?
Streaks often appear when the mop contains too much cleaner, the water becomes dirty, or the floor does not dry properly. Using the correct amount of product can make a noticeable difference.
Start with a clean mop and use the cleaner according to the label. Change dirty water instead of repeatedly spreading the same water over the floor.
Microfiber mop pads can help pick up fine dirt while using a controlled amount of moisture. Some ready-to-use floor cleaners are also designed to leave less residue when used as directed.
How Often Should You Clean a Kitchen Floor?
The best cleaning schedule depends on how much your kitchen is used. A family kitchen with frequent cooking and heavy traffic may need more frequent cleaning than a kitchen used only occasionally.
For everyday maintenance, sweep or vacuum when you notice crumbs and dirt. Mop when the floor becomes visibly dirty or develops sticky areas.
A simple routine can look like this:
- Daily: Remove crumbs, food particles and visible spills.
- Several times a week: Sweep or vacuum the main traffic areas.
- Weekly: Damp mop the entire kitchen floor.
- As needed: Deep-clean grout, grease spots and stubborn stains.
Cleaning frequency should increase when spills happen or when the kitchen receives heavy traffic. The CDC recommends cleaning surfaces when they are visibly dirty and cleaning high-use areas regularly.
How Do You Clean a Kitchen Floor After a Food Spill?
Food spills should receive quick attention because they can become sticky and harder to remove later. First, pick up solid food particles with a paper towel or cloth.
Blot liquid spills instead of spreading them around the floor. Then clean the area with a product that is safe for your flooring.
If raw meat, poultry, seafood, or their juices contaminate nearby kitchen surfaces, follow appropriate food-safety cleaning practices. The CDC recommends cleaning kitchen surfaces with hot, soapy water and using suitable sanitizing methods when needed.
For the floor itself, follow the flooring manufacturer’s instructions and the cleaner’s label. Do not assume that stronger chemicals always provide better cleaning.
Common Kitchen Floor Cleaning Mistakes
Many floor problems come from using too much water or too much cleaning product. More cleaner does not automatically mean a cleaner floor.
Another common mistake involves using one dirty mop for the entire kitchen. A dirty mop can spread grease and debris instead of lifting them away.
People also make the mistake of using abrasive tools on delicate flooring. Choose cleaning tools based on the floor material and avoid aggressive scrubbing unless the manufacturer approves it.
Never combine cleaning chemicals to create a stronger solution. This can produce dangerous reactions and harmful vapors, especially when bleach is involved.
How Do You Clean a Kitchen Floor for a Deep Clean?
A deep clean goes beyond normal sweeping and mopping. Start by moving appliances or furniture that you can safely move and clean the exposed areas.
Vacuum corners, edges and spaces under cabinets. Treat grease around cooking areas and pay extra attention to grout lines on tiled floors.
For stubborn tile and grout, use a suitable cleaner and follow the recommended dwell time. Avoid harsh scrubbing that can damage unsealed grout or the flooring surface.
After deep cleaning, rinse when the product instructions require it. Allow the floor to dry fully before putting rugs and furniture back in place.
How Do You Keep a Kitchen Floor Clean Longer?
A good maintenance routine reduces the need for frequent deep cleaning. Place washable mats near entrances and cooking areas to catch some dirt before it reaches the floor.
Clean spills as soon as they happen. Keeping a microfiber cloth or paper towels nearby makes quick cleanup easier.
You can also reduce floor buildup by cleaning high-mess areas more often. A few minutes of daily maintenance can save much more time during weekly cleaning.
Keep your mop clean and allow it to dry completely after use. Cleaning equipment should remain clean, properly maintained and dry between uses.
Frequently Asked Questions
Can I use dish soap to clean a kitchen floor?
A small amount of suitable soap may work for some surfaces, but you should follow the flooring and cleaner manufacturer’s instructions. Too much soap can leave residue.
Is hot water better for cleaning kitchen floors?
Warm water can help with some cleaning tasks, but the correct temperature depends on the cleaning product and flooring. Always follow the product label.
Should I mop before sweeping?
No. Sweep or vacuum first to remove loose dirt and crumbs. Mopping afterward helps remove stuck-on dirt and residue.
Can I use bleach on my kitchen floor?
Do not use bleach unless the flooring and product instructions allow it. Never mix bleach with other cleaners or disinfectants because dangerous vapors can form.
Why does my kitchen floor feel sticky after mopping?
Excess cleaner, dirty mop water, grease, or product buildup can create a sticky feeling. Use the recommended amount of cleaner and change dirty mop water.
How can I clean grout on a kitchen floor?
Start with a suitable tile or grout cleaner and use a soft or nylon brush when needed. Avoid harsh chemicals unless the grout and tile manufacturer approves them.
Is disinfecting my kitchen floor necessary?
Routine cleaning is often enough for normal household conditions. Disinfection may become more useful when someone is sick or when contamination occurs.
Conclusion
Learning how do you clean a kitchen floor does not require complicated equipment or expensive products. The most important steps are removing loose dirt, choosing the right cleaner, controlling moisture and using a clean mop.
Your flooring type should always guide your cleaning method. Tile, vinyl, laminate, hardwood and natural stone can respond differently to water and cleaning chemicals.
For everyday care, focus on quick spill cleanup and regular sweeping or vacuuming. Then use a proper damp-mopping routine to remove dirt, grease and residue from the surface.
The best kitchen floor cleaning routine is simple, consistent and safe for your specific flooring. When you use the right tools and avoid excessive chemicals, your kitchen floor can stay cleaner and look better for longer.